Tuesday 31 December 2013

Creative Idea

The pink skirt to match my 'Chanel Inspired Jacket' is completed and I used two remnants sitting in my basket - see image below.

I used the pink Tweed for the main part of the skirt and a remnant of black Swiss Broderie Anglaise for the hip piece. A skin coloured linng brings out the pattern of the embroidery. Now I have my perfect suit to treasure for years to come....

Be inspired!

Happy New New to all my readers
Rita

Sunday 22 December 2013

Christmas Dress

After many teething problems and small headaches my Christmas Dress is completed; can't wait to wear it! If you wish to make one for yourself for next Christmas, let me know. I run regular sewing classes.....

I designed and made this jacket 2 years ago. Just noticed that Chanel used the same fabric in their latest range; now I'll treasure my garment forever!! I do have a short piece left for a skirt. Stay tuned for more creative ideas....

Merry Christmas and a Happy New Year to all my visitors!

Sunday 10 November 2013


Create your very own masterpiece in one of my workshops. The jacket can be fringed or decorated with a hand crochet braid. The possibilities are endless! Take part in one of my workshops where you'll be taught the required techniques.

Sunday 18 August 2013

Sewing Instructions, Day 5

Now it's time to do the pockets. cut, interface and overlock pockets. Attach gros-grain to top of pockets and tack in place.
Edge stitch gros-grain in place. Press under seam allowance, tack and hand sew carefully.
Cut lining to fit pocket. Pin to wrong side and hand sew in place.


Once pockets are completed, add a row of chain stitch to gros-grain.
Crochet your braid to chain stitches and neaten yarns at the back.
Position pockets to jacket front and hand sew in place. Sew on buttons and give your jacket a final press. Voila, your master piece is now complete.

Not sure where to purchase your Tweed? Please let me know and I'll pass your inquiry on to your closest retailer. I'd love to hear from you!
Happy Sewing!


Saturday 17 August 2013

Sewing Instructions, Day 4

Today, we're working on the hand crochet braid.

The yarns used in the braid were provided by Linton Tweeds and make the perfect partner. The yarns pictured below were used to weave the fabric.
I found it easiest to make up a sample piece first to test various patterns. This way you can decide which braid will complement your jacket best.
A book called "around the corner Crochet Borders" by Edie Eckman came in very handy. It contains endless border patterns and it shows how to do the corners and many other things you need to know.
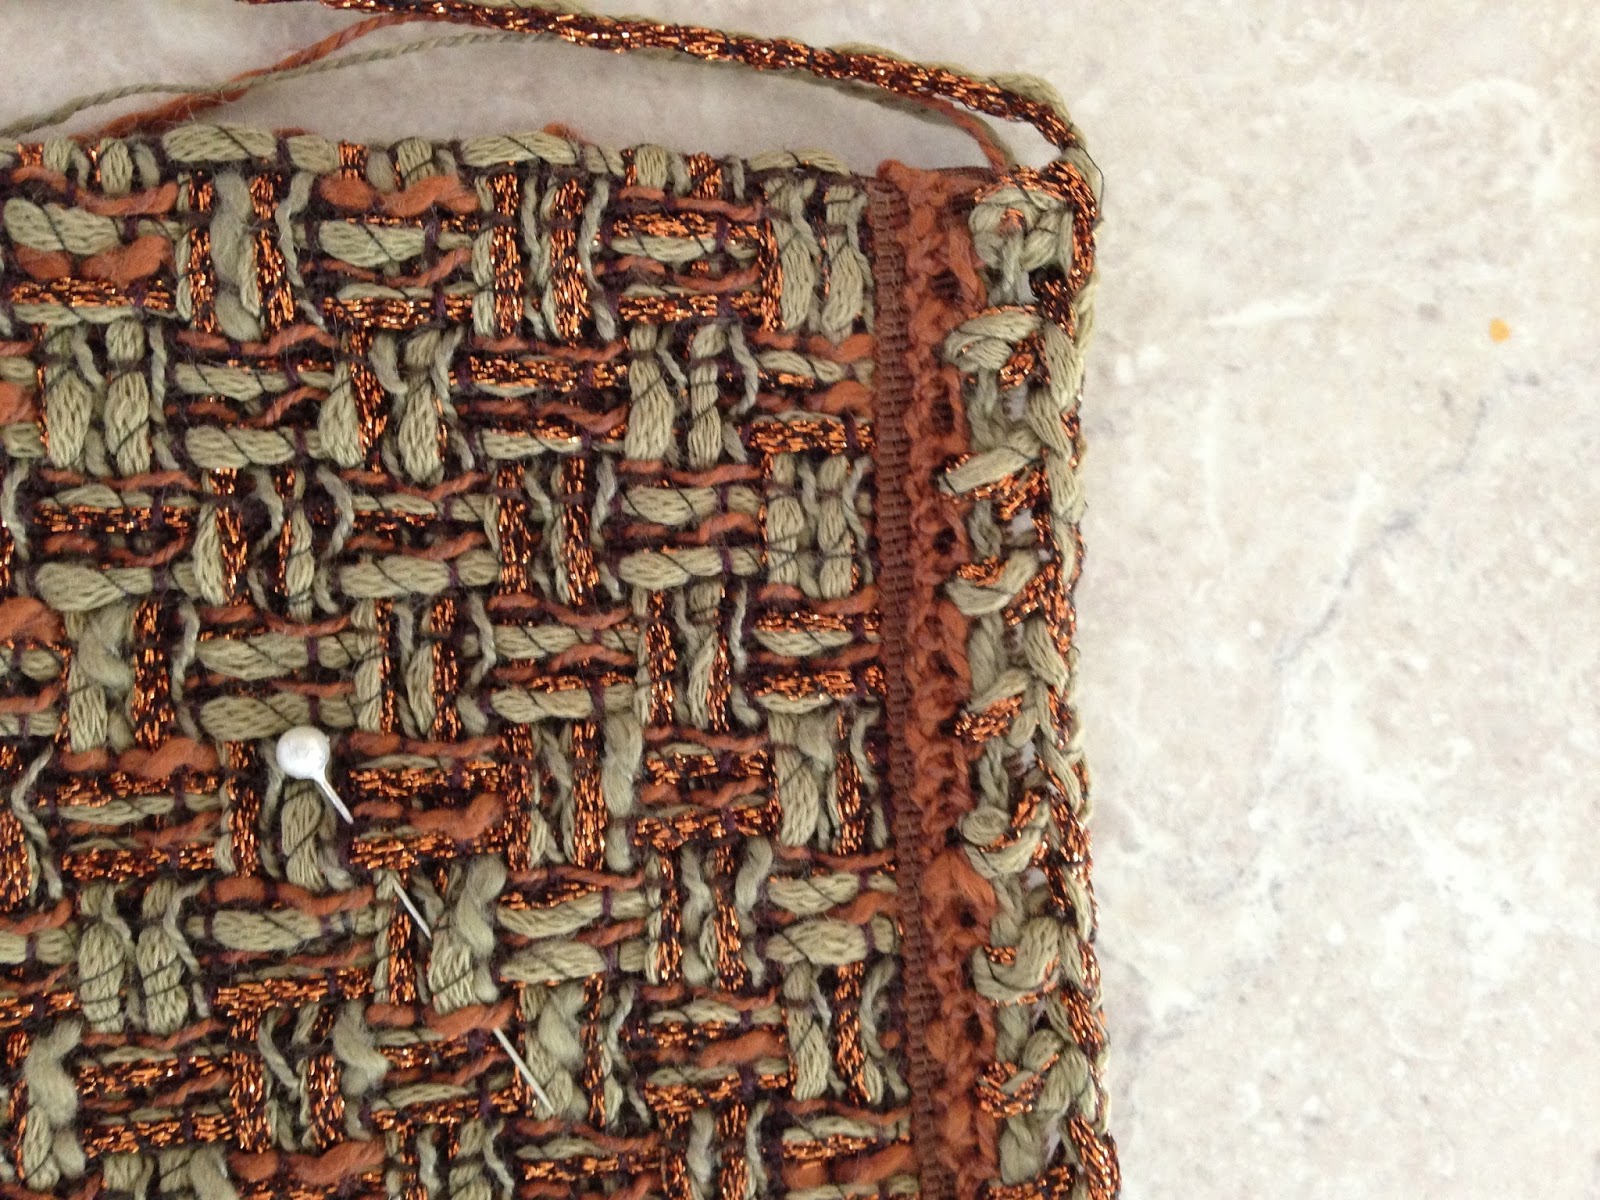
First, work a chain stitch all around the jacket edge.
Then start to crochet your pattern to the chain stitches, following the pattern instructions in the book.
Read the instructions for the corners carefully and make sure both side on the jacket fronts look identical.
Add a row of chain stitch to the sleeve opening.

Follow the instructions and complete the opening with your crochet broder making sure the braid lies flat around the corner.
Neaten off the yarns at the back of the braid and press carefully.

Not sure how go about this braid? I conduct regular sewing classes and workshops where you are taught all the required techniques to complete your very own master piece. Please contact me by email ricama@bigpond.net.au or phone 07 3300 3470. I'd love to hear from you!!


Thursday 1 August 2013

Sewing Instructions, Day 3

Now it's time to finish the sleeves as it is much easier when they're not attached to the bodice.

On the inside hand sew the top part of the under flap to the lining to keep it in place.
Two buttonholes go in each sleeve. I machine stitch them first and then over the top by hand with the buttonhole silk. It gives the Tweed extra stability and stops it from fraying.
Finally, attach the buttons to the sleeve.


Wednesday 31 July 2013

Sewing Instructions, Day 2

Today, we're working on the sleeves.

Quilt the lining to the sleeve as you did on the bodice, leaving the top seam open.

Join upper seam down to opening, matching the pattern of the Tweed. Press seam open.

Fold back part of lining towards front and tack to seam allowance. Stitch with zipper foot close to seam line and press.
Make up bias tape from lining and stitch to right side of sleeve flap. Trim allowance back, fold over and hand sew to wrong side.
Fold back front piece of lining and hand sew to stitching line.
Fold down lining from sleeve head; it will be hand sewn into the armhole by hand later.
Press gros-grain tape in half and tack carefully around sleeve opening.
Machine stitch in place using an edge stitch foot.


Sunday 28 July 2013

Sewing instructions, Day 1

Do the shoulder seams of the lining in the same manner and press after completion.

Trim off any excess lining on the hemline, centre front and neckline. Overlock centre front, hem and neckline neatly, ready for the gros-grain tape to be fitted.
Tack around armhole using large stitches and trim off any excess lining.


Sewing Instructions, Day 1

Join shoulder seams and side back seams by tacking. Now it's time for a fitting and small changes can be done on the side back seam and/or the shoulder seams.  Stitch seams of shell only and press open.

Fold lining of back towards front and tack to seam allowance of side back. Tack and stitch with zipper foot close to the seam line.
Fold lining of front towards back and fold under. Pin and tack in place and hand sew to previous stitching line.


Sewing Instructions, Day 1

All sounds like too much work and hard to follow? Don't despair, I run regular workshops in Brisbane and teach you all the techniques to create your own masterpiece. Please contact Rita for further details on 07 3300 3470 or ricama@bigpond.net.au

Join side fronts to centre fronts and centre back seam. Match all notches and pattern of the Tweed, pin, tack and stitch in place by machine. I highly recommend a walking foot as it walks on the fabric and doesn't drag the fabric down and out of place while sewing.
This jacket has a three-piece sleeve, a classic feature of many Chanel Jackets. This seam stays open for the time being. Close both under seams and press open.
Cut out lining pieces and join seams to match shell. Press all seams open. Place lining on Tweed, wrong sides together.
Prepare the lining for quilting by pinning it to the shell. Small pleats are necessary to accommodate the excess lining and make sure your lining is not sitting tight on the Tweed.
Mark quilting lines on the the shell and make sure they are equal on all pattern pieces. Quilt with your walking foot using 5mm stitches. Pull threads to the inside and neaten off.


Sewing Instructions, Day 1

Place the pattern pieces on the Tweeds carefully matching the pattern of the fabric.
Cut out all pattern pieces and interface with 2.5cm wide strips, cut on the bias. Overlock the edges to stop the Tweed from fraying.

Chanel Inspired Jacket, 1960's Style

My inspiration for my latest project is a 1960's Chanel Jacket, embellished with a hand crochet braid.

I chose a lovely Linton Tweed in a green and brown combination and for the lining an Italian silk satin was the perfect match.

The yarns for the hand crochet braid were generously provided by Linton Tweeds. They are actually used in the fabric, more about that later ......

Thursday 3 January 2013

Chanel Inspired Workshops


I regularly hold weekend workshops in Brisbane. You are taught all the required techniques to create your very own masterpiece. Next workshop will be held on the weekend of 2/3 March. Please visit www.ricamafabrics.com.au for further details

This workshop requires good dressmaking skills and is designed for experienced sewers only!


Chanel Inspired Jacket - Day 6

Make buttonholes by hand  and sew on buttons.
Hand sew weight chain to hem of jacket.
Set in sleeve, take care not to catch the lining. Fold up lining, pin and tack in place. Make small pleats at sleeve head to accommodate excess lining. Hand sew in place.


Chanel Inspired Jacket - Day 5

Join under sleeve seams and attach gros-grain to right side of Tweed.

Carefully attach lining to underflap of sleeve.

Cut and interface pocket pieces according to pattern instructions. Hand sew lining to the back and attach pocket to jacket fronts.
Attach gros-grain tape to neck and front and edge stitch in place.
Hem neck and fronts and hand sew lining close to jacket edge.